Content By Ryan E. Day

Ryan E. Day’s picture

By: Ryan E. Day

Industrial Custom Products (ICP) is a world leader in prototyping, developing, and manufacturing high-quality OEM and custom thermoformed and vacuum formed plastic components, as well as die cut and dieless knife-cut parts. What makes ICP unique among its competitors is its award-winning quality, on-time delivery rate of 99.5 percent, and a dazzling 22 ppm reject rate.

As an ISO 9001:2015 registered company, ICP is serious about quality. In fact, ICP has been awarded the Polaris Industries Award of Excellence a whopping eight times in a row. How does this company do it? One contributing factor is investing in appropriate technology and infrastructure to reduce bottlenecks that increase the cost of quality and reduce profitability.

Investing in infrastructure

“We recently invested in a new quality room located right off of the production floor,” says Adam Lunde, vice president of sales and marketing at ICP. “This has given us more space to bring in large parts for 3D scanning without interrupting progress on the production floor.”

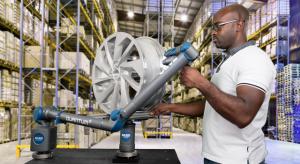
Even before the infrastructure upgrade, the ICP team’s inspection solutions included FARO products.

Ryan E. Day’s picture

By: Ryan E. Day

Midwest Metrology Solutions (MMS) is a company in Indiana that provides onsite precision measurement services using state-of-the-art metrology equipment and software. With an extensive knowledge of geometric dimensioning and tolerancing (GD&T), a primary focus on quality, and a proven track record in manufacturing expertise, MMS strives to ensure its customers have a competitive advantage.

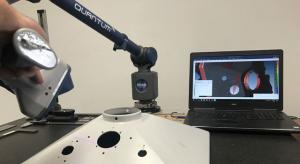
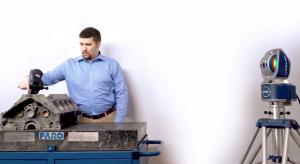
Midwest Metrology Solutions employs laser tracker technology for large-part inspection and alignment. The company’s main customers are those that cannot justify a full-time tracker and operator setup, but still require high precision measurement on large parts.

Challenge

Although laser tracker systems are the technology of choice for large-volume measurements, they do have an inherent operational challenge: line of sight.

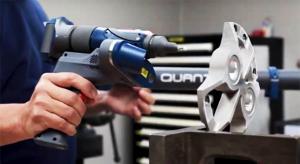
“The Achilles heel of the laser tracker is always line of sight,” explains Cody Thacker, owner of Midwest Metrology Solutions. “There’s always some place you just can't get a tracker into. Whether there’s a deep hole you need to reach down into, or a small surface that’s just around a corner from your tracker’s line of sight, for instance.”

Ryan E. Day’s picture

By: Ryan E. Day

Current business conversation often focuses on data and big data. Data are the raw information from which statistics are created and provide an interpretation and summary of data. Statistics make it possible to analyze real-world business problems and measure key performance indicators that enable us to set quantifiable goals. Control charts and capability analysis are key tools in these endeavors.

Control charts

Developed in the 1920s by Walter A. Shewhart, control charts are used to monitor industrial or business processes over time. Control charts are invaluable for determining if a process is in a state of control. But what does that mean?

Ryan E. Day’s picture

By: Ryan E. Day

In the article, “ANSI’s Role in the Wide World of Standards,” (Quality Digest, March 12, 2019), we looked at where standards originate and how companies are involved in developing them. In this article, we’ll outline four points that can help your organization integrate standards into your operations.

Once you’ve decided which standards are applicable to your needs, the question becomes whether your team will benefit from centralized access to standards, and how you will manage updates and collaborate. There are basically two ways to license standards: single-use purchase, and subscription. Each has its own pros and cons.

Ryan E. Day’s picture

By: Ryan E. Day

Brodie International provides liquid flow-meters and equipment for the petroleum and industrial markets. The company specializes in producing high-precision meters and valves that are used in the custody transfer of petroleum products.

The challenge

Brodie products involve components with complex shapes and assembly that made inspection measurements a serious challenge when using the traditional tools of their industry, which included height gauges, calipers, dial indicators, and a fixed coordinate measuring machine (CMM).

“We were using a fixed CMM,” says Tommy Rogers, quality manager at Brodie International. “Our older model CMM is good for measuring things like linear dimensions, hole patterns, tapers, circles, and geometry. But when it comes to measuring a compound curve like a helical shape, we were very limited.”

3D image-laser-scanning

Much of the QC oversight depended on proofing a product after final assembly.

Ryan E. Day’s picture

By: Ryan E. Day

Most of us have heard of kaizen—continuous improvement of philosophy and methodology. In business, this involves all employees working to improve a company's processes to lean it out, to run with less waste. But most of us who are familiar with kaizen think of it as something you do.

Especially, we think of kaizen as something you apply to an existing operation or process, or in terms of mounting a “kaizen blitz.” We tend to think of it as is trying to fix something that’s already broken. But what if you applied kaizen principles before your organization was actually up and running?

“The ideal time to think about using kaizen, or continuous improvement, is really phase one, or the feasibility study of construction or building out an existing manufacturing facility,” explains Dan Chartier, managing director of Kaizen Institute North America. “It’s important to get involved as early as possible in the project. This helps in assessing the efficiencies of the plan before it gets designed and constructed.”

Ryan E. Day’s picture

By: Ryan E. Day

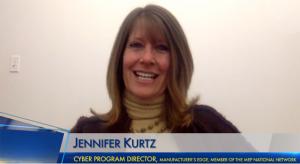
More and more, manufacturers are becoming the target of hackers, but what can they do about it, if anything? It seems every month, maybe even every week, we hear about some sort of data breach or cyberattack. Think Facebook, Google, and Marriott. As consumers we’ve almost become inured to the idea that our data are not really all that secure. But it isn’t just consumer companies and consumer data that are at risk; manufacturers are under attack as well. According to one report, manufacturing has surpassed any other sector, including financial services, as the greatest industry susceptible to cyber threats.

According to Information Age, in 2018 almost half of UK manufacturing companies were subjected to cyber attacks, and the problem may be similar in the United States. Although most of us may tend to think of cybersecurity on a personal level, hacking or data theft is just as important for manufacturers. So, how big of a problem is cybersecurity amongst manufacturers, and what can they do to protect themselves against attacks?

Ryan E. Day’s picture

By: Ryan E. Day

If you have worked in the quality field for anytime at all, you have probably heard of the Malcolm Baldrige National Quality Award—it’s the highest level of national recognition for performance excellence that a U.S. organization can receive. The award focuses on performance in five key areas and it is not easy to achieve the Baldrige award.

The current criteria are very thorough, and implementation is all-encompassing. As you might imagine, the audit is also very thorough. Now, when most people hear, “Baldrige program,” what they think of is, “Baldrige award.” But there's a lot more to the Baldrige Program and it goes way beyond just the award.

“We are just about ready to celebrate our 2018 Baldrige award recipients in a couple weeks,” says Robert Fangmeyer, Director of the Baldrige Performance Excellence Program at the National Institute of Standards and Technology. “On April 7, 2019, we will have our annual awards ceremony, the 31st award ceremony for the Baldrige award, and we will be honoring five organizations from four different sectors. That will be followed by our quest for excellence conference which runs from Monday to Wednesday.”

Ryan E. Day’s picture

By: Ryan E. Day

If your manufacturing organization is going to grow, you know you need an inspection solution beyond the capabilities of micrometers and calipers. You know you need to gather more data in a faster and more reliable manner. It’s time to invest in a 3D inspection solution like a coordinate measuring machine (CMM). You also know CMMs require a significant investment and you shouldn’t rush in uninformed. Here are three questions to ask yourself to help you make wise decisions that will result in a good return on investment.

These questions arose from a conversation I had with Elliott Mills, product and regional sales manager; and Les Baker, applications engineer; both with FARO Technologies. These two have several decades of combined experience using both fixed and portable CMMs in multiple industries. Their hard-earned insight about 3D inspection comes from many years on the shop floor. Before deciding on a metrology solution, it would be wise to consider the following:
1. What is the size of parts to be measured?
2. What is the actual level of accuracy required?
3. What are the throughput requirements?

[Read More]

Ryan E. Day’s picture

By: Ryan E. Day

According to the International Labor Organization, around the world every day 7,600 people die from work-related accidents or diseases—that’s more than 2.78 million people every year. To address the issue, the International Organization for Standardization (ISO) has developed a standard, ISO 45001 “Occupational health and safety management systems—Requirements,” that provides organizations with a framework to improve employee safety, reduce workplace risks, and create better and safer working conditions all over the world.

Published in March 2018, ISO 45001 replaces OHSAS 18001. Companies must migrate to the new standard by March 2021. ISO 45001 is an international standard, ensuring enhanced compatibility with other standards, such as ISO 9001 and 14001. This makes it easier to implement and integrate to a management system, giving increased value for users.

[Read More]