{domain:"www.qualitydigest.com",server:"169.47.211.87"} Skip to main content

        
User account menu
Main navigation
  • Topics
    • Customer Care
    • Regulated Industries
    • Research & Tech
    • Quality Improvement Tools
    • People Management
    • Metrology
    • Manufacturing
    • Roadshow
    • QMS & Standards
    • Statistical Methods
    • Resource Management
  • Videos/Webinars
    • All videos
    • Product Demos
    • Webinars
  • Advertise
    • Advertise
    • Submit B2B Press Release
    • Write for us
  • Metrology Hub
  • Training
  • Subscribe
  • Log in
Mobile Menu
  • Home
  • Topics
    • Customer Care
    • Regulated Industries
    • Research & Tech
    • Quality Improvement Tools
    • People Management
    • Metrology
    • Manufacturing
    • Roadshow
    • QMS & Standards
    • Statistical Methods
    • Supply Chain
    • Resource Management
  • Login / Subscribe
  • More...
    • All Features
    • All News
    • All Videos
    • Training

Stylus or Optical: Which Should You Chose?

Both technologies have applications for measuring surface texture

Mike Zecchino
Bio

Digital Metrology Solutions

Mark Malburg
Bio

Digital Metrology Solutions

Tue, 01/06/2026 - 12:02
  • Comment
  • RSS

Social Sharing block

  • Print
Body

Choosing the correct instrument for surface texture measurement can be confusing, given the wide range of options. Stylus-based instruments are the most prevalent in manufacturing. Yet, measuring a surface with a sharp stylus can seem old-fashioned when so many noncontact optical techniques are now available.

ADVERTISEMENT

In reality, both stylus and optical technologies have their place. Here’s a look at applications where each technique excels or has limitations.

Texture is more than roughness

Before we delve into surface texture measurement, it’s important to remember that surface texture is not a number: Texture consists of many “shapes,” which can be described as a spectrum of “wavelengths” ranging from shorter wavelength “roughness” to longer wavelength “waviness” and “form.”

All of these wavelengths may be important for an application. In a bearing, for example, controlling roughness may be important for reducing friction and wear, while controlling longer wavelength waviness may be critical to minimizing noise or chatter. What we call roughness or waviness will change with each application. For instance, the wavelengths we call roughness for an optical surface would be much smaller than the roughness that would matter for sandpaper.

A diagram of a roughness wave  AI-generated content may be incorrect.
Figure 1: Surface texture consists of shorter wavelength roughness and longer wavelength waviness and form.

Technologies for measuring surface texture

The vast majority of texture measurement instruments are either stylus-based or optical.

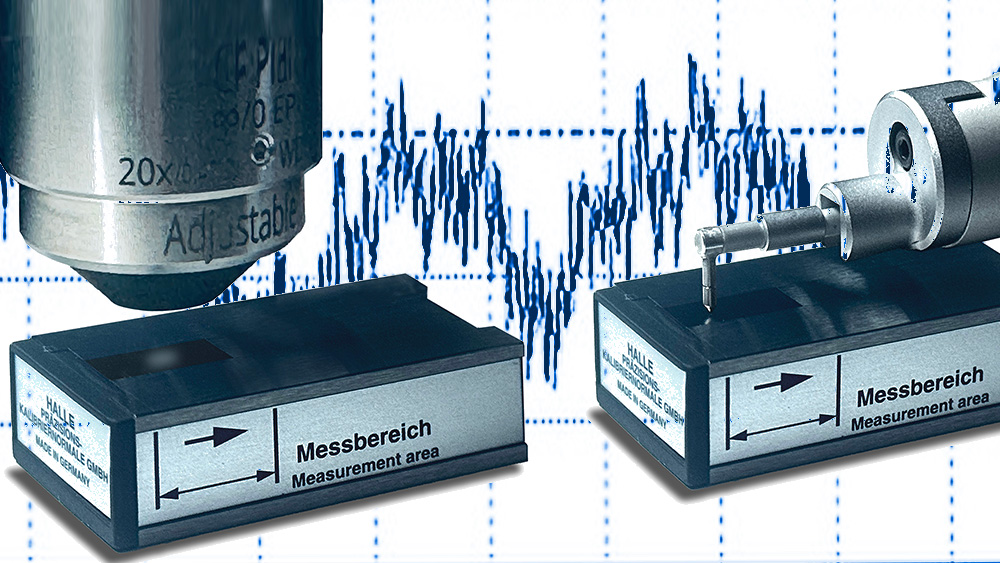
In stylus-based measurement, a “sharp” stylus is moved in a line across a surface while the vertical positions are recorded. The result is a “profile” that represents the surface texture (Figure 2).

A close-up of a metal tube  AI-generated content may be incorrect.
Figure 2: A stylus-based instrument on a surface, and a 2D profile measurement. Courtesy Digital Metrology Solutions.

Stylus gauges are typically of two forms: skidded and skidless (Figure 3). Skidded instruments include a large, flat skid that rides on the surface. The stylus moves relative to the skid to measure roughness. Skidded systems are typically lower cost and are often more robust for use in difficult environments such as manufacturing shop floors.

Skidless instruments record the stylus deflections relative to a precision reference, or datum, so they can measure longer-wavelength waviness in addition to roughness. Without the skid, however, the stylus is more susceptible to damage and is more influenced by vibration.

A close-up of different types of tools  AI-generated content may be incorrect.
Figure 3: A skidded stylus for roughness measurement and a skidless stylus for measuring both roughness and waviness. Courtesy The Surface Texture Answer Book (Digital Metrology Solutions, 2021).

Noncontact, 3D optical measurement instruments rely on properties of light to measure surface heights. These instruments typically measure over an area rather than along a single profile. Many optical techniques are now available, each with unique advantages and disadvantages. These instruments are becoming very common in research and industrial applications.

A person standing next to a computer screen  AI-generated content may be incorrect.
Figure 4: 3D optical profiler objective and 3D surface data. Courtesy Digital Metrology Solutions.

Advantages of 3D data over 2D

One of the primary advantages of optical instruments is that they typically produce 3D data maps. Seeing a surface in 3D can shed light on what’s happening in the texture much more readily than a single profile or a single parameter value. An areal (3D) measurement is more likely to capture surface features that might be missed altogether by a single stylus trace across the surface. The deepest or tallest portion of features such as tiny pits or nodules are also more likely to be captured by an areal measurement, allowing more accurate calculation of texture parameters. Moreover, certain 3D aspects of a surface, such as the volume of fluid that it can retain, can only be measured using 3D techniques.

A close-up of a green and blue diagram  AI-generated content may be incorrect.
Figure 5: Pits and pores can only be reliably measured from 3D/areal data. Courtesy Digital Metrology Solutions.

One shortcoming of optical measurement, however, is the size of an individual acquisition. A 3D measurement can appear to be a vast landscape, but in reality the measured area may be quite small. Figure 6 shows that typical optical 3D measurements may be much smaller than a standard 2D stylus profile. In most cases, an optical system configured at the same lateral resolution as a stylus instrument will produce an image that’s only about 0.5 x 0.5 mm.

A close-up of a penny  AI-generated content may be incorrect.
Figure 6: Optical 3D acquisitions at the same resolution as a stylus cover only tiny measurement areas. Courtesy The Surface Texture Answer Book.

Speed

Some optical metrology systems can acquire measurement data very quickly. A phase-shifting interferometer, for example, may measure a smooth surface in a few seconds or less. Measuring the roughness of typical machined surfaces, however, can take considerably longer. To measure a ground or honed surface using a coherence scanning optical profiler may require 10–15 seconds, for example.

If we compare total measurement cycle times rather than just the acquisition times, optical techniques might not be faster at all. Most optical systems require time to align, locate features, and focus. Challenging geometries or materials may require even more adjustments. With a handheld stylus gauge, however, an inspector can often make a measurement by simply placing the gauge on the surface and adjusting only a few settings.

Resolution and accuracy

Intuitively, measuring with light would seem to provide higher resolution than measuring with a physical stylus. Optical measurement data, with millions of data points and continuous 3D renderings, certainly looks “high resolution.” However, there is much more to this topic of comparing resolutions.

The geometry of a stylus does, in fact, limit the smallest size features that can be measured. However, the resolution of an optical system will also be limited by factors such as the diffraction limit of the optics, the numerical aperture, and the pixel size in the sensor. Selecting a different lens/objective can completely change the range of measurable wavelengths, as shown in Figure 7.

A screenshot of a computer generated image  AI-generated content may be incorrect.
Figure 7: Comparison of an 80x objective and a 20x objective (Keyence VR 3100) on the same sandpaper surface. Courtesy Digital Metrology Solutions.

Waviness measurement

In applications where waviness matters, we typically need a longer length (or larger area) of data. A typical skidless stylus can acquire a long trace (up to tens of millimeters long), from which we can assess both roughness and waviness simultaneously. With an optical system, however, we typically must “stitch” together many small acquisitions to produce a measurement of sufficient length for waviness measurement while also maintaining sufficient resolution for roughness. Acquiring these data can be a lengthy process.

Stitching together optical measurements can also introduce errors. During the stitching process, the software must rely on small zones of overlap between the acquisitions to estimate their relative tilt and position. Any instability in those small regions can lead to errors that can propagate across the measurement (Figure 8), which can amplify or obscure errors in the surface.


Figure 8: Instability in the small overlap regions between acquisitions can lead to errors that can propagate across a stitched measurement.

Environment

Texture measurement in manufacturing environments is often influenced by vibration. Most optical systems are highly susceptible to vibration, so these instruments must typically be well isolated and physically separated from machinery, traffic, and air handlers.

Although a stylus measurement will also be influenced by vibration, a skidded stylus can measure roughness in much less ideal environments. This ability to measure roughness despite a degree of vibration makes it possible to measure at the location where process control is required, rather than placing parts into a queue for an instrument in an isolated lab.

Close-up of a machine  AI-generated content may be incorrect.
Figure 9: A skidless stylus measuring a production shaft journal. Courtesy Digital Metrology Solutions.

Materials

Some materials may be challenging to measure on an optical system, depending on the sensing method. For example, highly reflective optics or surfaces with steep slopes can scatter light, causing the measurement system to “miss” the information at these pixels. The measurement will be compromised if the surface can’t reflect sufficient light or texture back to the measurement optics. A stylus instrument may be a better solution in these cases.

Softer materials might prove to be difficult to measure with a stylus, because the sharp tip may scratch materials such as plastics or optical coatings. In these cases, a noncontact optical method may be more appropriate.

Features

Both stylus and optical systems have advantages for particular features and geometries. An optical system may be able to measure texture in a small O-ring groove or a tiny annular ring that might be challenging with a stylus. Mirror attachments can enable optical measurement inside of small bores that are inaccessible with a stylus. A handheld stylus, on the other hand, may be able to measure texture on a large component that can’t be physically placed under the lens of an optical measurement system.


Figure 10: The tip of a ballpoint pen body may be easier to measure optically than with a stylus. Courtesy Digital Metrology Solutions.

Learning curve

In a production setting, both stylus and optical instruments can be programmed to measure with a single mouse click. But when the application requires a user to know how to configure the system, a stylus typically has fewer options and considerations. Stylus instruments (especially lower cost, handheld gauges) are relatively easy to learn to use. A new user can pick up the basics in a few minutes.

While some optical systems are simple to learn, most involve many more settings than a stylus—all of which can make the difference between good and bad data.

Cost

A handheld skidded stylus can often be purchased for under $3,000, or even less on the used market. Although entry-level optical systems have come down dramatically in price in recent years, most optical instruments will cost significantly more than a stylus and will require additional infrastructure as well.

Ultimately, both stylus and optical measurement instruments have their applications. Which instrument will be the most appropriate for a given measurement will depend on all of these factors, as well as lead time and the current availability of equipment. In every case, the goal is to establish reliable data that can guide manufacturing. Whether the best technology for making the measurement is brand-new or 100 years old is certainly secondary to that goal.

Add new comment

The content of this field is kept private and will not be shown publicly.
About text formats
Image CAPTCHA
Enter the characters shown in the image.

© 2025 Quality Digest. Copyright on content held by Quality Digest or by individual authors. Contact Quality Digest for reprint information.
“Quality Digest" is a trademark owned by Quality Circle Institute Inc.

footer
  • Home
  • Print QD: 1995-2008
  • Print QD: 2008-2009
  • Videos
  • Privacy Policy
  • Write for us
footer second menu
  • Subscribe to Quality Digest
  • About Us