{domain:"www.qualitydigest.com",server:"169.47.211.87"} Skip to main content

User account menu
Main navigation
  • Topics
    • Customer Care
    • FDA Compliance
    • Healthcare
    • Innovation
    • Lean
    • Management
    • Metrology
    • Operations
    • Risk Management
    • Six Sigma
    • Standards
    • Statistics
    • Supply Chain
    • Sustainability
    • Training
  • Videos/Webinars
    • All videos
    • Product Demos
    • Webinars
  • Advertise
    • Advertise
    • Submit B2B Press Release
    • Write for us
  • Metrology Hub
  • Training
  • Subscribe
  • Log in
Mobile Menu
  • Home
  • Topics
    • 3D Metrology-CMSC
    • Customer Care
    • FDA Compliance
    • Healthcare
    • Innovation
    • Lean
    • Management
    • Metrology
    • Operations
    • Risk Management
    • Six Sigma
    • Standards
    • Statistics
    • Supply Chain
    • Sustainability
    • Training
  • Login / Subscribe
  • More...
    • All Features
    • All News
    • All Videos
    • Contact
    • Training

Staging for Gauging

Knowing how the part is designed, and where the measurement is to be made, can be key to staging the measuring instrument

George Schuetz
Tue, 11/10/2020 - 12:03
  • Comment
  • RSS

Social Sharing block

  • Print
Body

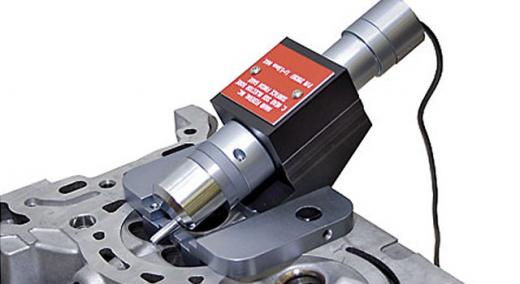
Before a fixture gauge is designed, the engineer must understand what specifications must be inspected. In many respects, the gauge’s design reflects not only the design of the part but also the manufacturing processes that produced it.

ADVERTISEMENT

Machinists must establish datums in order to machine a part accurately, and gauge designers often need to know what those datums are in order to position the part repeatably relative to the gauge head or other sensitive device. Sounds simple and straightforward, but that is not always the case.

Sometimes the parts are so large that they cannot easily be brought to the gauge, and a special arrangement might be required to bring the gauge to a section of the part. Other times, the part is so small that it seems impossible to get to the dimension that must be measured. Gauge designers are always amused when a part print—that comes in at 10 times the normal size—refers to a small land at the bottom of the bore. At 10 times the size, it looks pretty simple, although in reality it may be impossible to measure.

This is when good fixture design comes into play to ensure the measurement can be made in a way that is easy for the operator to make, and to produce repeatable and accurate results.

 …
Want to continue?
Log in or create a FREE account.
Enter your username or email address
Enter the password that accompanies your username.
By logging in you agree to receive communication from Quality Digest. Privacy Policy.
Create a FREE account
Forgot My Password

Add new comment

Image CAPTCHA
Enter the characters shown in the image.
Please login to comment.
      

© 2025 Quality Digest. Copyright on content held by Quality Digest or by individual authors. Contact Quality Digest for reprint information.
“Quality Digest" is a trademark owned by Quality Circle Institute Inc.

footer
  • Home
  • Print QD: 1995-2008
  • Print QD: 2008-2009
  • Videos
  • Privacy Policy
  • Write for us
footer second menu
  • Subscribe to Quality Digest
  • About Us
  • Contact Us