Body
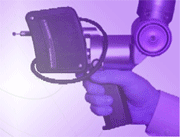
 Switching from a coordinate measuring machine (CMM) to a laser scanner has helped the National Aeronautics and Space Administration, Langley Research Center, increase the accuracy of models used to evaluate proposed spacecraft designs in wind tunnels. Accuracy is critical for the 6- to 12-in. scale models, because the smallest deviation from the original design could substantially alter performance. It used to take two to three days to measure 30,000 points on the model, which was only enough to define key cross-sections. Recently, NASA has substantially improved this process by measuring the models with a laser scanner that projects laser light onto surfaces while cameras continuously triangulate the changing distance and profile of the laser as it sweeps along.
 “With laser scanning, we can capture between four and five million points in four to five hours, substantially reducing the amount of time required for inspection, while at the same time providing enough accuracy to fully define the geometry of most models,” says Ed Covington, quality assurance specialist for NASA’s Langley Research Center. “This provides greater assurance than before that our wind-tunnel test results are accurate, while saving time and money.”
…
Want to continue?
Log in or create a FREE account.
By logging in you agree to receive communication from Quality Digest.
Privacy Policy.
Add new comment