{domain:"www.qualitydigest.com",server:"169.47.211.87"} Skip to main content

User account menu
Main navigation
  • Topics
    • Customer Care
    • FDA Compliance
    • Healthcare
    • Innovation
    • Lean
    • Management
    • Metrology
    • Operations
    • Risk Management
    • Six Sigma
    • Standards
    • Statistics
    • Supply Chain
    • Sustainability
    • Training
  • Videos/Webinars
    • All videos
    • Product Demos
    • Webinars
  • Advertise
    • Advertise
    • Submit B2B Press Release
    • Write for us
  • Metrology Hub
  • Training
  • Subscribe
  • Log in
Mobile Menu
  • Home
  • Topics
    • 3D Metrology-CMSC
    • Customer Care
    • FDA Compliance
    • Healthcare
    • Innovation
    • Lean
    • Management
    • Metrology
    • Operations
    • Risk Management
    • Six Sigma
    • Standards
    • Statistics
    • Supply Chain
    • Sustainability
    • Training
  • Login / Subscribe
  • More...
    • All Features
    • All News
    • All Videos
    • Contact
    • Training

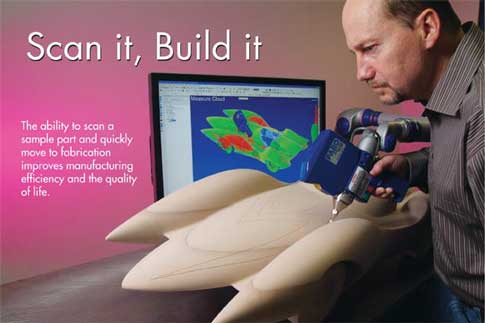
Scan It, Build It

The ability to scan a sample part and quickly move to fabrication improves manufacturing efficiency and the quality of life.

Tue, 06/24/2008 - 21:35
  • Comment
  • RSS

Social Sharing block

  • Print
Body

When Gabe Draguicevich was asked to help fabricate a titanium hip implant based on CT (computed tomography, also known as CAT) scan data, he had to coordinate numerous technologies to complete the project. Because the CT data consisted of 2-D cross-sections, Draguicevich had to stack and align the individual scans to create a 3-D model, which he used to create a polygonal mesh in the form of a stereolithography (STL) file. After creating a prototype, he had to verify it against the original scan data, which was no mean feat considering that software capable of providing deviation analysis of the model surface to the STL file did not exist. Finally, Draguicevich created a wireframe model from the STL mesh to machine the final product. The entire process took approximately two weeks to complete.

That was 20 years ago. According to Draguicevich, “If I had the tools that are available today, I could have simply taken the CT scan data and created the STL mesh in one step, and then machined directly from the mesh. The data-processing capabilities of modern software have made the entire process painless compared to years past. Furthermore, I could have taken the finished piece and inspected it for accuracy using the original scan data as the reference. Any deviations could have been addressed by modifying the finished part in coordination with the inspection process.”

 …

Want to continue?
Log in or create a FREE account.
Enter your username or email address
Enter the password that accompanies your username.
By logging in you agree to receive communication from Quality Digest. Privacy Policy.
Create a FREE account
Forgot My Password

Comments

Add new comment

Image CAPTCHA
Enter the characters shown in the image.
Please login to comment.
      

© 2025 Quality Digest. Copyright on content held by Quality Digest or by individual authors. Contact Quality Digest for reprint information.
“Quality Digest" is a trademark owned by Quality Circle Institute Inc.

footer
  • Home
  • Print QD: 1995-2008
  • Print QD: 2008-2009
  • Videos
  • Privacy Policy
  • Write for us
footer second menu
  • Subscribe to Quality Digest
  • About Us
  • Contact Us