Michael W. Metzger  |  12/02/2008

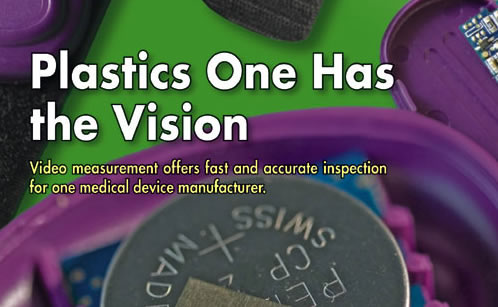
Plastics One Has the Vision

Video measurement offers fast and accurate inspection for one medical device manufacturer.

Visual Dimensional Metrology

Essential in quality control, vision-based multisensor metrology allows supplied components and materials to be quality-checked before, during, and after incorporation into a final product. It can also provide an audit trail enabling a point of failure to be accurately pinpointed in time as well as providing a means of early detection and diagnosis of the problem. Early correction can save time, reduce waste, save money, and most important, safeguard a company’s reputation for reliability and quality.

The metrology system most appropriate to a company’s needs depends on factors such as the work piece size, materials, sampling rate and inspection speed, repeatability, level of accuracy required, and ease of documentation. In most cases, throughput is the critical factor in deciding between manual or automated systems. For small-volume work, manual visual metrology tools may be adequate, although rapid throughput of large numbers of samples generally requires the type of automation found in vision systems. An intermediate solution, such as a manual metrology microscope with semi-automated functions, may fit the bill for some companies.

Multisensor systems, typically a vision sensor and touch probe, are designed to take advantage of the benefits of both noncontact measurement and contact measurement in one machine. Multisensor machines enable accurate measurement on areas previously inaccessible to optical technologies and provide greater sample versatility.

Plastic injection molding technology is rapidly being embraced by the medical device manufacturing community, where quality and durability are the gold standards. These are the very standards that one company, Plastics One, has built a reputation on, and the reason that the company recently made the switch to an automated vision system for the inspection, measurement, and validation of its products.

Plastics One, a medical device company manufacturing plastic injection moldings, supplies critical components to a who’s who of medical research and device manufacturers around the world. The 60-year-old company is well-respected for its broad offerings and high-quality custom designs in plastic moldings. With its own internal design group, the company’s products are created in-house from raw material. This means that the company must be able to ensure quality at every aspect of the design. They do this by designing quality into the production process, and back it up, bringing together the necessary people and equipment to assess and rectify any quality issues, but more important, to prevent quality issues from developing in the first place.

Medical device manufacturers face two key constraints that can be at odds with each other: maintaining a very low failure rate while keeping the price affordable. Lives are at stake, and equipment must meet the highest standards to ensure patient safety and accurate results. Because of this, plastic-injection molded products are a perfect solution for a multitude of medical device products. Reliable, affordable, and repeatable performance is needed across the industry, and plastic can meet that challenge when properly produced.

A wide range of intricate shapes and designs are routinely molded in plastic. Additionally, injection molding is often more cost-effective than other manufacturing processes. However, plastic manufacturing comes with its own set of production and quality control issues. This is in addition to those already inherent in medical device manufacturing, such as being able to check the quality of end-products and spotting when key tolerances are beginning to drift out of specification. For medical device manufacturing, there is also a need to verify the quality of raw materials prior to release from inventory and provide a complete audit trail for regulatory purposes.

With plastic manufacturing, the sheer speed of the bring-to-market injection molding process poses a real challenge in terms of effective quality control. Once production is set up on a molding machine and the first-article run is made, the quality and dimensions of the product must be carefully verified. Once the first-part validation is complete, the manufacturer produces a sample run of parts. The sample parts are tested to verify quality and to check for process drift. Equally challenging to plastic manufacturing is managing the range of colors, textures, sizes, and complexity of components that need to be inspected. Manufacturers need to be able to check statistically valid numbers of samples yet avoid compromising their demanding production schedules.

To continue to offer its customers superior products while expanding its position in the industry, two years ago Plastics One investigated updating its measuring equipment. At the time, the company had been conducting mold validations using primarily manual measurement equipment. Although the existing measuring equipment was certainly capable of getting the job done, the company knew it had to do better. Because of the increasing throughput demands of plastic molding, Plastics One needed to gather more data in a shorter time frame to ensure quality to its customers.

The manual measurement methods were excessively time-consuming, which wasn’t desirable because many customers were demanding faster turnaround. At the start of a new project, mold validations sometimes took as long as four weeks. Each mold had as many as 121 measurement features that needed to be completely characterized. This, coupled with the fact that the existing manual system was more than 10 years old and had outdated edge- detection technology, created a challenging situation for the company. Using old technology, it was having less confidence in the accuracy, and limited control over the repeatability of, the measurements. This meant that the measuring system was limiting the amount of new work that the company was able to do by compromising its ability to manufacture first articles to verify that products met the customer’s design specifications. These delays were costing Plastics One both time and money. It was clearly time for a change in this process.

A change for the better

Plastics One spent several months researching the marketplace to upgrade its capabilities for new measuring solutions. Like many other companies in this position, Plastics One sought fast and accurate equipment at a reasonable cost of ownership. To achieve its objective, automated, noncontact video was considered to be the technology needed to get the job done. Plastics One ultimately decided to purchase a multisensor vision measuring system from Nikon Instruments Inc. designed specifically to measure 3-D parts.

The iNEXIV VMA-2520 measuring solution gave Plastics One immediate improvement measurements, most notably due to the excellent optics offered on the equipment. The ability to quickly and reproducibly measure key components and manage specified tolerances plays a key role in ensuring the quality of injection molding for medical devices. Vision-based technology, which examines a part with a digital camera to determine exact position and other measurement features, allows rapid measurements to be made on large numbers of small and complex components at a rate that can keep pace with demanding production schedules.

With a vision system, an optically magnified image is captured and converted to a digital signal, which is then analyzed by specialized software. Different illumination options enable repeatable and reproducible edge detection. Even edges on dark or clear parts can be correctly refracted, detected, and reproducibly measured. Automated noncontact video measurement can also be used to compare computer-aided design (CAD) vs. actual data and perform real-time statistical process control.

Because the system can be easily programmed for automatic measurement, the time for mold validations has been cut to a week and a half from four weeks. As a result, in the custom molding division, Plastics One can now do many more first articles on parts, allowing the company to head off problems at the start of a batch before the process can create parts that don’t meet customer specifications. The improved speed has also enabled the company to measure more incoming parts to verify quality before incorporation into its own equipment.

“I’ve been using this type of equipment for 21 years, and just don’t see the same types of problems that I used to see before,” says David King, a quality assurance engineer for Plastics One. “We get better results and more accurate measurements with the new equipment.”

Other key features

In fact, the company has found a significant process control improvement from vision technology in its Cpk analysis information, and reduced data variability. Previously, Plastics One could not run a Cpk analysis on new molds.

Repeatability has drastically improved as well. In a recent gauge repeatability and reproducibility (GR&R) study, Plastics One found that the repeatability of the new equipment was ten times that of the old system. This is primarily a result of the ease of programming and the automated measurement capabilities of the system. King also notes that although three of the employees currently using the vision measuring system have no background in measuring, they had almost no trouble learning how to use the equipment. After only a short training period, they were able to write measurement programs.

Vision systems also typically include a graphic display that shows the operator what the probes are seeing. This makes it easier to understand where the points are going to be taken, which simplifies data analysis. Edges are fully visible and measureable, allowing the programmer to discriminate between edges that may be close together. This also helps prevent the machine from measuring data points on dust and dirt particles. As a result, mistakes encountered while running in automatic mode are significantly decreased.

Another key feature is EDF stitching. This feature enables users to capture data that may be too large to fit into a camera’s field of view by having the machine piece together multiple images to create a complete view of a product--one 3-D picture.

New vision systems also offer significantly improved computer-controlled lighting, adding consistency to measurements. Where Plastics One’s old system only had single incandescent bottom and top lights, the new vision system offers LED lighting, which is more stable and gives the same light each and every time a measurement program is run. It also incorporates a ring light made up of eight banks of individually programmable LEDs positioned in a pie shape above the part. This allows the light to be moved around the part to highlight edges that are not accessible with just the top light or bottom light.

The addition of a directional touch probe has helped the company gain new measuring capabilities. A touch-probe lets users measure features that can’t be measured by the vision probe, either because the view of the feature is blocked or is too deep. In fact, Plastics One had started a project for one of its customers prior to purchasing the equipment and found that it wasn’t able to adequately measure the part’s wall thickness. With new equipment, the company was able to take advantage of the more advanced touch probe and acquire the necessary information to complete the project.

Conclusion

Automated vision measuring systems can provide the highest level of accuracy needed for medical device manufacturing without compromising speed. Requiring no manual user intervention, these systems can run detailed, multistep measurement routines on an array of parts, using a CCD camera, motorized optics and stages, automatic focus, and closed loop-positioning capabilities. As these features become integral in equipment manufacturing, vision-based measuring equipment will become increasingly prominent in the medial device industry.


Discuss

About The Author

Michael W. Metzger’s default image

Michael W. Metzger

Michael W. Metzger is the general manager of sales and marketing for Nikon Instruments Inc., headquartered in Melville, New York. Metzger manages all sales and marketing efforts for Nikon’s premier optical and digital measuring products throughout North and South America. Metzger joined Nikon in 1991 and has more than 33 years of experience in optical and dimensional metrology. He has been an ASQ-certified quality engineer and was also certified by the U.S. Navy as an optical and measuring specialist.