Featured Product
This Week in Quality Digest Live
Operations Features
Eric Whitley
Robotic efficiency coupled with human intuition yields a fast, accurate, adaptable manufacturing system
Etienne Nichols
How to give yourself a little more space when things happen
InnovMetric Software
One software capable of operating portable metrology equipment and CMMs within the same user interface
MIT News
Mens, Manus and Machina (M3S) will design technology and training programs for human-machine collaboration
Gleb Tsipursky
The future of work is here, and AI is the driving force

More Features

Operations News
A centralized platform and better visibility are key improvements
Greater accuracy in under 3 seconds of inspection time
Oct. 17–18, 2023, in Sterling Heights, Michigan
Enables scanning electron microscopes to perform in situ Raman spectroscopy
For current and incoming students in manufacturing, engineering, or related field
Supports back-end process control
Transforming the development and optimization of bioprocesses using Tetra data
For processed, frozen, and preprocessed vegetables, confections, and more
Signalysis SigQC software now fully integrated with MECALC QuantusSeries instrumentation

More News

Mike Richman

Operations

Preparing for Quality

Driving efficiency and increasing value through material testing

Published: Wednesday, October 31, 2018 - 12:03

For manufacturers in diverse sectors such as automotive, aerospace, electronics, and medical device, there’s little question that ensuring great quality would be impossible without the proper testing of materials. And proper material testing applications begin with reliable and repeatable preparation methods.

Metallography is the microscopic study of the structure and components of pure metals and metallic alloys. For the purposes of test and measurement as well as quality control, understanding the microstructural flaws, tensile strength, hardness, and other attributes found in fasteners, coatings, and components is obviously of great import. Being able to accomplish such testing efficiently and accurately allows factories to achieve necessary throughput.

Material preparation

There’s no better way of judging the structural and long-term properties of the material than looking at the structure of the material itself,” says Mike Keeble, Ph.D., U.S. lab and technology manager for Buehler, a leading manufacturer of scientific equipment and supplies for use in materials analysis.

To make those determinations, a technician who needs to undertake material testing of certain parts or components must begin by preparing the samples for microscopic analysis. Usually this involves grinding or polishing the sample, since a consistent surface quality is necessary for accurate testing and analysis.

Much of the detail necessary to achieve accuracy involves processes such as selecting the correct surfaces to use for polishing ferrous or nonferrous metals, alloys, steels, and/or ceramics, and selecting the correct suspension, pastes, and accessories to assist technicians in easily analyzing the sample under the microscope in the testing lab. These preparatory techniques can make important differences in the accuracy and repeatability of the derived results of the tests.

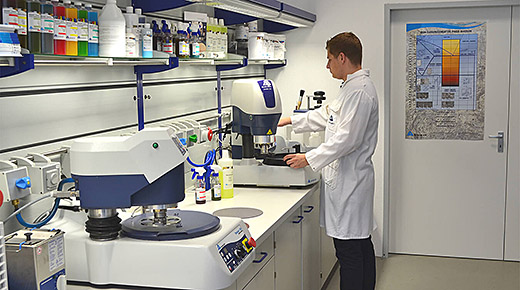
Much of the detail necessary to achieve accurate material testing occurs in a lab.

Benefits of proper testing

Companies like Buehler work with their industrial clients to ensure that the materials being analyzed work reliably and in expected ways. For materials that may be used in solar panels, nonconformance can lead to poor performance that may cost customers lots of time and money. For other applications, such as medical devices or components used in aircraft assemblies, the consequences of failure can be measured in terms of lives lost.

“We think about applications that are critical to quality and critical to safety,” says Keeble. “If you look at an aircraft, our equipment may be used to assess any structural component, but we most often work on the most critical areas, such as turbine engine components. The engine is made up of complex assemblies, including multiple turbine blades; those blades have complex shapes, and the materials in those blades need to have rigorously controlled structures as well as internal cooling channels running through them. Those cooling channels need to be the right shape and the right size, and they need to be clear and clean. These turbines also employ complex coatings for different areas of the engine, and those coatings must be accurately checked because they need to have the right thickness, the right shape, the right porosity, and other features.”

Carbon fiber imaged under differential interference contrast at 500X magnification

Who does this work now and in the future?

It goes without saying that materials testing on critical components like aircraft turbine blades is an important function usually performed by highly experienced and well-trained members of the manufacturer’s quality control teams. In many cases, the people looking down the eyepiece of a microscope and engaged in this sort of testing are specialized technicians with extensive experience in metallography. Often, these individuals function as the quality manager for the organization as well.

These technicians and others in the testing lab (and many times, in research and development operations as well) are key guardians of the performance of the manufacturer’s products. From the perspective of effect on an organization’s reputation, these professionals are among the most important employees in the entire operation.

It’s for this reason that the development of the next generation of quality professionals with an interest in metallographic testing is so important. And, like so many areas of industry, it’s clear that too few people are entering these important industrial occupations when future staffing needs are considered.

“This is an important question,” states Keeble. “There are not enough technicians coming into the field with experience in metallographic analysis.

“What you don’t want to see is the level of knowledge dropping among the people working in these labs,” Keeble continues. “Lack of knowledge and experience can easily result in the misapplication of the process, potentially leading to misinterpretation of results, passing things that shouldn’t pass, and failing things that shouldn’t fail. Good testing equipment can help, but if the knowledge base isn’t there to really understand the results that the equipment provides, then it’s all for naught. That’s why I’m very interested in supporting educational opportunities for those coming into the industry, and continuous training for our existing customers, too.”

A material testing case study

As one would expect, different materials have different attributes. Titanium, for example, will deform and burn during the cutting process if it’s cut inappropriately, so blade selection and careful cutting is extremely important. Steel, on the other hand, is not so sensitive. Brittle materials can crack as they’re being prepared.

Metallographic preparation can also be a delicate process. Improperly executed grinding and polishing procedures can have serious repercussions when judging whether materials will pass or fail a specific test. Technicians must keep all of this in mind as they are preparing and testing these and other materials.

Keeble offers an example of how this plays out in a real-world situation:

“We had an application of a turbine blade that had a thermal spray coating on it. There had been a misapplication of a polishing procedure that made it appear as if there was a crack in the lamination between the coating and the base material, which would be a valid reason to fail the blade.

“Actually, however,” Keeble went on, “what occurred was that the preparation was misapplied; the blade had been poorly ground and over-polished (which is called ‘rounding and shadowing’), and that’s what caused the apparent crack. When it was prepared properly it was clearly a good component.”

Cracking in a spot weld between two titanium plates (cross-polarized light at 50X magnification)

Issues like this during the preparation phase can cause either false positives or false negatives; both are serious concerns that need to be addressed. A false negative test (i.e., failing a component that should pass quality control testing) can cause the unnecessary loss of entire batches of samples, components, or parts, which can quickly run into the thousands or tens of thousands of dollars for a single line in a single plant. Multiply that several dozen times across a complex enterprise, and the losses add up quickly. False positives (passing a component that should fail the quality control test) are even worse; no quality manager or lab technician—much less an executive—wants to contemplate the quality escape of faulty and potentially dangerous products into their supply chain or customer facility.

The enduring importance of test and measurement

Without the ability to confirm the structural integrity of materials and components, quality as we know it cannot exist for industrial enterprises. Material testing is an essential core function for manufacturers in a wide range of sectors, yet all too often, executive leadership considers it a less important driver of quality output than methodologies like lean, management systems such as ISO 9001, or data-driven frameworks such as statistical process control (SPC).

The notion that overarching methodologies, systems, or frameworks are more important than good old-fashioned test and measurement is misguided, however. Quality means delivering the best possible output for customers, and although cultural elements make excellence possible, scientific and analytical competence will always be crucially important as well, now and in the future.

Excellent material testing practices offer an exceptional return on investment for quality-minded manufacturers. Whether saving time, saving money, or saving lives, the benefits of identifying flawed parts or components before they leave the factory are clear. Proper preparation and testing of materials can help achieve that important goal.

Discuss

About The Author

Mike Richman’s picture

Mike Richman