{domain:"www.qualitydigest.com",server:"169.47.211.87"} Skip to main content

User account menu
Main navigation
  • Topics
    • Customer Care
    • FDA Compliance
    • Healthcare
    • Innovation
    • Lean
    • Management
    • Metrology
    • Operations
    • Risk Management
    • Six Sigma
    • Standards
    • Statistics
    • Supply Chain
    • Sustainability
    • Training
  • Videos/Webinars
    • All videos
    • Product Demos
    • Webinars
  • Advertise
    • Advertise
    • Submit B2B Press Release
    • Write for us
  • Metrology Hub
  • Training
  • Subscribe
  • Log in
Mobile Menu
  • Home
  • Topics
    • 3D Metrology-CMSC
    • Customer Care
    • FDA Compliance
    • Healthcare
    • Innovation
    • Lean
    • Management
    • Metrology
    • Operations
    • Risk Management
    • Six Sigma
    • Standards
    • Statistics
    • Supply Chain
    • Sustainability
    • Training
  • Login / Subscribe
  • More...
    • All Features
    • All News
    • All Videos
    • Contact
    • Training

Using a Laser Tracker for Machine Tool Volumetric Error Compensation

An innovative methodology for large machine tool calibration

Dave Maxham
Mon, 10/26/2009 - 09:30
  • Comment
  • RSS

Social Sharing block

  • Print
Body

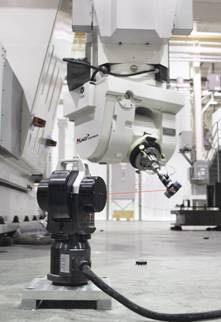
A joint project of NCMS called Volumetric Accuracy for Large Machine Tools (VALMT), partnering Automated Precision, Boeing, Siemens and Mag Cincinnati, has pioneered an innovative process and established new methodology in volumetric error compensation for large machine tools. Volumetric error compensation or VEC, is a true volumetric calibration that improves close tolerance and working accuracy of complex five- and six-axis machine tools throughout their entire working envelope.

ADVERTISEMENT

Introduction

Day after day it’s the same problem for machine tool owners. They spend well into six figures for a high-precision machine tool and they have a great deal of difficulty determining why it’s not cutting parts accurately. The typical culprits are usually the same: ball screw or rack-and-pinion errors due to wear, machine-build tolerances, metal fatigue, maybe even foundation problems like sag all. All of these contribute to the inaccuracies they face.

 …

Want to continue?
Log in or create a FREE account.
Enter your username or email address
Enter the password that accompanies your username.
By logging in you agree to receive communication from Quality Digest. Privacy Policy.
Create a FREE account
Forgot My Password

Add new comment

Image CAPTCHA
Enter the characters shown in the image.
Please login to comment.
      

© 2025 Quality Digest. Copyright on content held by Quality Digest or by individual authors. Contact Quality Digest for reprint information.
“Quality Digest" is a trademark owned by Quality Circle Institute Inc.

footer
  • Home
  • Print QD: 1995-2008
  • Print QD: 2008-2009
  • Videos
  • Privacy Policy
  • Write for us
footer second menu
  • Subscribe to Quality Digest
  • About Us
  • Contact Us