|
|
|||||||||||||||||||||
 |
 |
||||||||||||||||||||
 |
|||||||||||||||||||||
|
|
|||||||||||
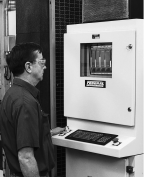
When manufacturers think about automating the gaging/inspection process, speed of throughput is usually the primary objective. As a rule of thumb, any time a part must be inspected every 45 seconds or less, automation may be cost-justified. But speed is not the only viable objective: Automated gages have several virtues and may be justified even in some applications where throughput is relatively slow. Automation can free up skilled personnel to perform more productive tasks. A major agricultural equipment manufacturer installed automatic gages to control the production of transmission gear blanks. A robot loads rough blanks into CNC lathes, then removes the turned parts and fixtures them on an automated gage. The gage checks two IDs and two ODs, then the robot removes the part and transfers it to the next production cell. If the gage detects that a part dimension is creeping, it sends a signal to the lathe to adjust itself. If a part is actually out of tolerance, the gage shuts down the cell and signals the operator for immediate attention. Throughput of this application is not high: Each cell produces only one part every five minutes or so. Nevertheless, the gage is cost-justified because it reduces the workload of the cell operator. Previously, one machinist was required for each of the cells, to perform the measurements and maintain control over the lathes. With the addition of the automatic gages, a single operator easily maintains control over both cells, and scrap has been substantially reduced. Eliminating repetitiveness for human inspectors is another viable objective of automation. Too much repetition is bad for the inspection process because operators tend to become bored and careless. And repetition may be bad for the operator who must perform the same physical motions thousands of times per day. Reliability is another consideration. When it is unacceptable to pass any bad parts -- because of warranty costs, customer requirements or because the part will be used in a critical safety application -- automation can provide a higher level of assurance than human inspectors. That said, it must be admitted that speed of throughput is indeed the most common objective of automated gaging. To get back to the 45-second rule of thumb: Distinguish between the time required to take a measurement and the time required to go through a complete part-measurement cycle. Measuring a single feature may take three seconds or so. But the complete cycle involves many other functions that may include: selecting the part and fitting it in the gage, operating the gage, taking readings for multiple features, saving or printing the gage results, removing the part from the gage and depositing or sorting the part properly. Even in relatively simple applications, a human operator usually can't average one part every 45 seconds over the course of an entire day. Depending on the application, parts can be gaged with automation in three seconds or less. Automation is expensive, however -- particularly in terms of the time required to specify and engineer a system. Another rule of thumb therefore states that an application should last at least one year for automation to be cost-justified. If the application is of shorter duration, it is usually more economical to hire additional human inspectors and equip them with manually operated gages. Automatic gages are as diverse as their applications, which is to say that virtually no two are the same, and each must be custom-engineered. Companies engaged in the design and manufacture of automatic gaging typically subject prospective jobs to a detailed questionnaire, which begins with a description of the part and proceeds to the number and nature of the dimensions and tolerances to be measured, expected variations from the blueprint (e.g., presence of grease or flash, lack of fill, maximum out-of-tolerance anticipated), the method to feed and remove parts from the gage, the continuity of the cycle (on demand or at a constant rate of feed), the level of certainty required and dozens of other factors. The challenge to the gage maker is to incorporate all of these demands into a design that provides the required throughput and accuracy in the most reliable and cost-effective manner. About the author As applications manager, gaging products, at Federal Products Co. in Providence, Rhode Island, Drew Koppelmann provides dimensional gaging applications assistance to companies in a wide range of industries, including automotive, aerospace, packaging and electronics. He may be reached by fax at (401) 784-3246. |
