|
|
||||||||||||||||||
 |
 |
|||||||||||||||||
 |
||||||||||||||||||
|
|
||||||||||||||
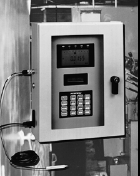
Any phase of manufacturing may require inspection gaging. To ensure compliance to specifications, finished parts obtained from outside vendors may have to pass through acceptance testing as soon as they enter the plant. Parts made in-house are often gaged before being processed further, assembled or otherwise put into use. Machinists may stop their machines a number of times during the processing of a single part in order to take measurements and "creep up" on a specification. Gaging may also be used to actually control the machining process: This is known as process control gaging, and it, too, can occur before, during or after the manufacturing process. The repeatability of a production process may be influenced by a number of variables, such as tool wear, growth or deformation of the machine tool or work piece due to heat build-up and vibration, either from within the machine tool itself or from external sources. Combatting these variables normally requires intensive operator intervention. A better approach, however, is process control gaging. Gages that work directly and automatically with machine tool controllers can help maintain tight tolerances, improve productivity and reduce scrap in spite of process variables. With in-process control gaging, an amplifier/controller converts the signal from the gage head into a dimensional measurement and communicates that data to the machine tool to make necessary adjustments to the production process. In most modern control gage applications, the gage head generates an analog signal, which the amplifier converts into a digital format for output. Compared to earlier versions of the technology, modern control gages offer higher resolution and accuracy, and faster response, promoting rapid rates of metal removal on high-precision parts. Some advanced systems offer additional convenience features such as automatic zeroing and offset (tool-wear compensation) capabilities, switchable inch/metric digital displays and a choice of comparative or absolute size measurements -- all of which enhance system functionality and ease of use. As noted, control gaging may occur before, during or after the part is produced. Post-process control gaging is often practical where dimensional drift is gradual. Finished parts move directly from the machine tool to the gage. If the gage detects deviation from the nominal specification beyond certain limits, it signals the machine tool's controller to apply compensation, so that the next part is brought closer to the specified dimension. Some processes drift too rapidly for the post-process approach. For example, if a particularly large amount of metal is to be removed, tool wear may be substantial during a single operation. (This is often the case in grinding operations.) Machine prepositioning may, therefore, provide an inadequate basis for process control, and in-process control of the machine tool may be required. In-process gaging monitors part size continuously, supporting real-time control over the machine. In many in-process grinding applications, a cartridge-type gage head is in direct contact with the work piece. This enables the gage to control part size even as the cutting tool wears. Tool wear, of course, is not the only common process variable. It is often more practical to monitor machine position, rather than part size, with an in-process gage. For example, the gage may measure the ram position on a centerless grinder, as opposed to the part dimension. This isolates the gage head somewhat from the harshest elements of the process, and improves both accuracy and component longevity in some applications. Some processes are so highly variable that even in-process control is difficult to apply. For example, parts made of heterogeneous materials may be subject to unpredictable thermal expansion during machining. Preprocess control gaging may be an appropriate solution: The part is measured prior to machining, and the gage instructs the machine controller how much material to remove before it starts. With metal chips flying and coolant spraying all around, process control applications place unusually harsh demands on gaging equipment. The gage controller and the electronic gage heads must be properly ruggedized, sealed and shielded against contamination. Specify components that can be replaced readily and economically. About the author As applications manager, gaging products, at Federal Products Co. in Providence, Rhode Island, Drew Koppelmann provides dimensional gaging applications assistance to companies in a wide range of industries, including automotive, aerospace, packaging and electronics. He may be reached by fax at (401) 784-3246. |
